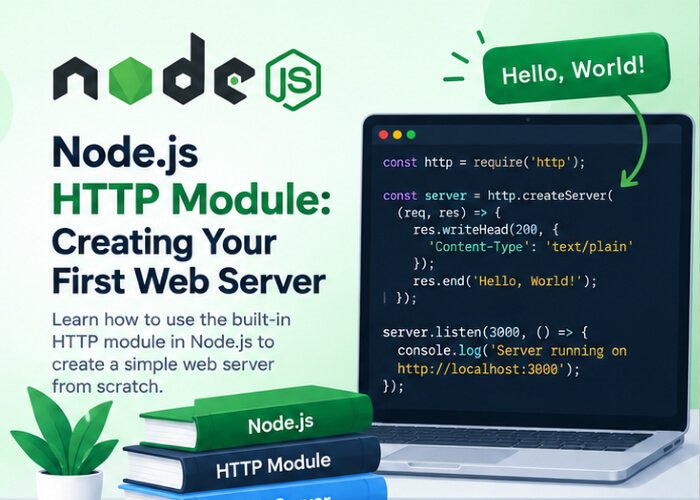
When learning Node.js, one of the best ways to understand how backend development works is to create a web server without using a framework.
Node.js provides a built-in module called the
HTTP module that allows you to create web servers, receive HTTP requests, and send responses to clients.
In this tutorial, we will learn how to use the Node.js HTTP module to create our first web server from scratch.
You will learn:
- What the Node.js HTTP module is
- How HTTP requests and responses work
- How to create a basic web server
- How to handle different URLs
- How to handle HTTP methods
- How to return HTML and JSON responses
- How to set HTTP status codes
- How to set response headers
- How to read request data
- How to create a simple REST API
- Why frameworks such as Express.js are useful
What is the Node.js HTTP Module?
The
HTTP module is a built-in Node.js module that provides functionality for creating HTTP servers and making HTTP-related requests.
Because it is a built-in module, you don’t need to install it using npm.
You can import it using:
const http = require("http");
You can then use the module to create a web server.
What is a Web Server?
A web server is a program that receives requests from clients and sends responses back.
For example, when you enter:
http://localhost:3000
into your browser, the browser sends an HTTP request to the server.
The server processes the request and sends a response.
The basic flow looks like this:
Browser
   |
   | HTTP Request
   ↓
Node.js Server
   |
   | HTTP Response
   ↓
Browser
A response could contain:
- HTML
- JSON
- Text
- Images
- Files
- Other data
What is HTTP?
HTTP stands for
Hypertext Transfer Protocol.
It is a protocol used for communication between clients and servers.
For example:
Client → HTTP Request → Server
Client ← HTTP Response ← Server
An HTTP request can contain information such as:
- HTTP method
- URL
- Headers
- Request body
The server sends back:
- Status code
- Response headers
- Response body
Creating Your First Node.js Web Server
Let’s create a simple Node.js server.
Create a file called:
server.js
Add the following code:
const http = require("http");

const server = http.createServer((req, res) => {
    res.end("Hello from Node.js!");
});

server.listen(3000, () => {
    console.log("Server running on port 3000");
});
Now run:
node server.js
You should see:
Server running on port 3000
Open your browser and visit:
http://localhost:3000
You should see:
Hello from Node.js!
Congratulations! You have created your first Node.js web server.
Understanding the Code
Let’s break down the example.
Importing the HTTP Module
const http = require("http");
This loads Node.js’s built-in HTTP module.
No npm installation is required.
Creating the Server
const server = http.createServer((req, res) => {
    res.end("Hello from Node.js!");
});
The
createServer() method creates an HTTP server.
The callback function receives two important objects:
req
res
req
req stands for
request.
It contains information about the request sent by the client.
res
res stands for
response.
It is used to send a response back to the client.
Sending the Response
The following line sends a response:
res.end("Hello from Node.js!");
Once
res.end() is called, the response is completed.
Starting the Server
server.listen(3000, () => {
    console.log("Server running on port 3000");
});
The
listen() method tells Node.js to listen for incoming connections on port
3000.
You can then access the server using:
http://localhost:3000
Understanding req and res
The
req and
res objects are central to working with the Node.js HTTP module.
For example:
const http = require("http");

const server = http.createServer((req, res) => {
    console.log(req.method);
    console.log(req.url);

    res.end("Request received");
});

server.listen(3000);
If you visit:
http://localhost:3000
you may see:
GET
/
in your terminal.
Understanding req.method
The
req.method property tells you which HTTP method was used.
For example:
console.log(req.method);
Common HTTP methods include:
GET
POST
PUT
PATCH
DELETE
If you visit a URL normally from your browser, the request will usually use:
GET
Understanding req.url
The
req.url property contains the requested URL path.
For example:
console.log(req.url);
If the user visits:
http://localhost:3000/about
the value will generally be:
/about
For:
http://localhost:3000/contact
it will be:
/contact
This allows us to create different responses for different URLs.
Creating Multiple Routes
The basic HTTP module doesn’t provide Express-style routing, but we can implement simple routing ourselves.
For example:
const http = require("http");

const server = http.createServer((req, res) => {

    if (req.url === "/" && req.method === "GET") {
        res.end("Home Page");
    }

    else if (req.url === "/about" && req.method === "GET") {
        res.end("About Page");
    }

    else if (req.url === "/contact" && req.method === "GET") {
        res.end("Contact Page");
    }

    else {
        res.statusCode = 404;
        res.end("Page Not Found");
    }
});

server.listen(3000, () => {
    console.log("Server running on port 3000");
});
Now you can visit:
/
 /about
 /contact
Each URL returns a different response.
Setting the HTTP Status Code
HTTP status codes tell the client what happened with a request.
For example, a successful response commonly uses:
200 OK
A page that doesn’t exist commonly uses:
404 Not Found
You can set a status code using:
res.statusCode = 404;
For example:
const http = require("http");

const server = http.createServer((req, res) => {
    res.statusCode = 404;
    res.end("Page Not Found");
});

server.listen(3000);
Common HTTP Status Codes
Here are some status codes you will frequently encounter:
| Status Code |
Meaning |
| 200 |
OK |
| 201 |
Created |
| 204 |
No Content |
| 400 |
Bad Request |
| 401 |
Unauthorized |
| 403 |
Forbidden |
| 404 |
Not Found |
| 500 |
Internal Server Error |
Understanding HTTP status codes is important when building web servers and APIs.
Setting Response Headers
HTTP responses can contain headers that provide additional information about the response.
You can set headers using:
res.setHeader("Content-Type", "text/plain");
For example:
const http = require("http");

const server = http.createServer((req, res) => {

    res.setHeader("Content-Type", "text/plain");

    res.end("Hello Node.js");
});

server.listen(3000);
The
Content-Type header tells the client what type of content the response contains.
Returning HTML
You can return HTML from a Node.js HTTP server.
Set the content type to:
text/html
Example:
const http = require("http");

const server = http.createServer((req, res) => {

    res.setHeader("Content-Type", "text/html");

    res.end(`
        <html>
            <head>
                <title>Node.js Server</title>
            </head>
            <body>
                <h3>Welcome to Node.js</h3>
                <p>This page is served by Node.js.</p>
            </body>
        </html>
    `);
});

server.listen(3000);
Open:
http://localhost:3000
Your browser will render the HTML page.
Returning JSON
Node.js HTTP servers can also return JSON data.
This is particularly useful when creating APIs.
Example:
const http = require("http");

const server = http.createServer((req, res) => {

    res.setHeader("Content-Type", "application/json");

    const response = {
        message: "Hello from Node.js",
        success: true
    };

    res.end(JSON.stringify(response));
});

server.listen(3000);
The response will look like:
{
    "message": "Hello from Node.js",
    "success": true
}
The
JSON.stringify() method converts the JavaScript object into a JSON string that can be sent as the HTTP response body.
Creating a Simple JSON API
Let’s create a small API that returns a list of users.
const http = require("http");

const users = [
    {
        id: 1,
        name: "John"
    },
    {
        id: 2,
        name: "Sarah"
    }
];

const server = http.createServer((req, res) => {

    if (req.url === "/api/users" && req.method === "GET") {

        res.setHeader("Content-Type", "application/json");

        res.end(JSON.stringify(users));

    } else {

        res.statusCode = 404;

        res.setHeader("Content-Type", "application/json");

        res.end(JSON.stringify({
            message: "Route not found"
        }));
    }
});

server.listen(3000, () => {
    console.log("API running on port 3000");
});
Now visit:
http://localhost:3000/api/users
The server returns:
[
    {
        "id": 1,
        "name": "John"
    },
    {
        "id": 2,
        "name": "Sarah"
    }
]
This is the basic idea behind an API.
Handling Different HTTP Methods
You can check both the URL and HTTP method.
For example:
if (req.url === "/users" && req.method === "GET") {
    // Get users
}
For a POST request:
if (req.url === "/users" && req.method === "POST") {
    // Create user
}
For PUT:
if (req.url === "/users" && req.method === "PUT") {
    // Update user
}
For DELETE:
if (req.url === "/users" && req.method === "DELETE") {
    // Delete user
}
This allows you to build basic REST APIs using only Node.js.
Reading POST Request Data
When a client sends data using a POST request, the request body arrives as a stream.
You can listen for data using the
data event.
For example:
const http = require("http");

const server = http.createServer((req, res) => {

    if (req.url === "/users" && req.method === "POST") {

        let body = "";

        req.on("data", (chunk) => {
            body += chunk;
        });

        req.on("end", () => {
            console.log(body);

            res.end("User data received");
        });

    } else {
        res.statusCode = 404;
        res.end("Not Found");
    }
});

server.listen(3000);
The request body is received in chunks.
The
data event is triggered when a chunk arrives.
The
end event indicates that the entire request body has been received.
Parsing JSON Request Data
If the client sends JSON, you can parse the request body using
JSON.parse().
For example:
const http = require("http");

const server = http.createServer((req, res) => {

    if (req.url === "/users" && req.method === "POST") {

        let body = "";

        req.on("data", (chunk) => {
            body += chunk;
        });

        req.on("end", () => {

            try {
                const user = JSON.parse(body);

                console.log(user);

                res.setHeader("Content-Type", "application/json");

                res.end(JSON.stringify({
                    message: "User received",
                    user: user
                }));

            } catch (error) {

                res.statusCode = 400;

                res.end("Invalid JSON");
            }
        });

    } else {
        res.statusCode = 404;
        res.end("Not Found");
    }
});

server.listen(3000);
A client could send:
{
    "name": "John",
    "email": "john@example.com"
}
The server parses the JSON and can work with it as a JavaScript object.
Understanding Request Headers
HTTP requests can contain headers that provide additional information about the request.
You can access them through:
req.headers
For example:
const http = require("http");

const server = http.createServer((req, res) => {

    console.log(req.headers);

    res.end("Headers received");
});

server.listen(3000);
You can also access a specific header:
console.log(req.headers["user-agent"]);
Another common header is:
console.log(req.headers["content-type"]);
Headers are commonly used for things such as:
- Content type
- Authentication
- Cookies
- Caching
- Client information
Understanding Query Parameters
A URL can contain query parameters.
For example:
http://localhost:3000/search?name=john
The query parameter is:
name=john
Node.js provides the
URL class to help parse URLs.
For example:
const http = require("http");

const server = http.createServer((req, res) => {

    const url = new URL(req.url, `http://${req.headers.host}`);

    const name = url.searchParams.get("name");

    res.end(`Searching for: ${name}`);
});

server.listen(3000);
If you visit:
/search?name=john
the response will be:
Searching for: john
Creating a Simple REST API
Let’s combine what we have learned to create a small REST-style API.
const http = require("http");

const users = [
    {
        id: 1,
        name: "John"
    },
    {
        id: 2,
        name: "Sarah"
    }
];

const server = http.createServer((req, res) => {

    res.setHeader("Content-Type", "application/json");

    if (req.url === "/users" && req.method === "GET") {

        res.statusCode = 200;

        res.end(JSON.stringify(users));

    } else if (req.url === "/users" && req.method === "POST") {

        let body = "";

        req.on("data", (chunk) => {
            body += chunk;
        });

        req.on("end", () => {

            try {
                const newUser = JSON.parse(body);

                newUser.id = users.length + 1;

                users.push(newUser);

                res.statusCode = 201;

                res.end(JSON.stringify(newUser));

            } catch (error) {

                res.statusCode = 400;

                res.end(JSON.stringify({
                    message: "Invalid JSON"
                }));
            }
        });

    } else {

        res.statusCode = 404;

        res.end(JSON.stringify({
            message: "Route not found"
        }));
    }
});

server.listen(3000, () => {
    console.log("Server running on port 3000");
});
This simple example demonstrates:
- Creating an HTTP server
- Handling GET requests
- Handling POST requests
- Reading request bodies
- Parsing JSON
- Sending JSON responses
- Setting status codes
- Basic routing
Testing Your HTTP Server
You can test a Node.js server using your browser,
curl, or an API client.
For a GET request:
curl http://localhost:3000/users
For a POST request:
curl -X POST http://localhost:3000/users \
-H "Content-Type: application/json" \
-d "{\"name\":\"Michael\"}"
You can also use tools such as Postman or similar API clients to send different types of HTTP requests.
Serving an HTML File
The HTTP module can also work with the File System module to serve files.
For example:
const http = require("http");
const fs = require("fs");

const server = http.createServer((req, res) => {

    if (req.url === "/") {

        fs.readFile("index.html", (error, data) => {

            if (error) {
                res.statusCode = 500;
                res.end("Unable to load page");
                return;
            }

            res.setHeader("Content-Type", "text/html");

            res.end(data);
        });

    } else {

        res.statusCode = 404;
        res.end("Page Not Found");
    }
});

server.listen(3000);
This demonstrates how Node.js modules can work together.
Here:
const http = require("http");
const fs = require("fs");
we are using:
- HTTP module for the server
- File System module for reading the HTML file
Understanding Ports
A server needs a port on which it listens for incoming connections.
For example:
server.listen(3000);
means the application is listening on port
3000.
You can use another port:
server.listen(5000);
The application would then be available at:
http://localhost:5000
Common development ports include:
3000
5000
8000
8080
The port you choose depends on your application and environment.
Using an Environment Variable for the Port
Instead of hard-coding the port, you can use an environment variable:
const port = process.env.PORT || 3000;

server.listen(port, () => {
    console.log(`Server running on port ${port}`);
});
This is useful when deploying an application because the hosting environment may provide the port number.
Node.js HTTP Module vs Express.js
At this point, you might wonder:
If Node.js already provides an HTTP module, why do developers use Express.js?
The HTTP module provides the low-level functionality needed to create an HTTP server.
However, as applications become larger, manually handling routing, request parsing, middleware, validation, and other concerns can become repetitive.
Express.js provides a higher-level framework that simplifies many of these tasks.
For example, with the HTTP module:
if (req.url === "/users" && req.method === "GET") {
    // Handle request
}
With Express.js:
app.get("/users", (req, res) => {
    res.json(users);
});
Express provides convenient features such as:
- Routing
- Middleware
- Request handling
- Response helpers
- Error handling
- API development
Understanding the HTTP module first makes it easier to understand what frameworks such as Express.js are doing for you.
Common Beginner Mistakes
1. Forgetting to Call listen()
Creating a server is not enough.
You also need to start listening:
server.listen(3000);
2. Forgetting res.end()
A response should eventually be completed.
For example:
res.end("Hello");
If your request handler never completes the response, the client may continue waiting.
3. Using the Wrong Content-Type
If you return JSON, use:
res.setHeader("Content-Type", "application/json");
If you return HTML:
res.setHeader("Content-Type", "text/html");
Using the appropriate headers helps clients correctly interpret the response.
4. Forgetting to Handle Errors
File operations, JSON parsing, and other asynchronous operations can fail.
Always consider how errors should be handled.
5. Forgetting That Request Bodies Arrive as Streams
POST and other requests with bodies may arrive in multiple chunks.
Use:
req.on("data", ...)
and:
req.on("end", ...)
to collect the body before processing it.
Important Node.js HTTP Methods
The HTTP module provides several useful methods and properties.
Some important ones include:
http.createServer()
Creates an HTTP server.
server.listen()
Starts listening for incoming connections.
req.method
Returns the HTTP request method.
req.url
Returns the requested URL.
req.headers
Provides request headers.
res.statusCode
Sets or retrieves the response status code.
res.setHeader()
Sets a response header.
res.write()
Writes part of the response.
res.end()
Finishes the response.
res.write() vs res.end()
You can use
res.write() to send part of a response.
For example:
res.write("Hello ");
res.write("from ");
res.write("Node.js");

res.end();
The client receives:
Hello from Node.js
However, you must eventually call:
res.end();
You can also provide the final content directly:
res.end("Hello from Node.js");
For simple responses,
res.end() is often sufficient.
Complete Beginner Example
Here is a complete example that combines several concepts:
const http = require("http");

const server = http.createServer((req, res) => {

    res.setHeader("Content-Type", "application/json");

    if (req.url === "/" && req.method === "GET") {

        res.statusCode = 200;

        res.end(JSON.stringify({
            message: "Welcome to the Node.js server"
        }));

    } else if (req.url === "/about" && req.method === "GET") {

        res.statusCode = 200;

        res.end(JSON.stringify({
            message: "This is the About page"
        }));

    } else if (req.url === "/api/users" && req.method === "GET") {

        res.statusCode = 200;

        res.end(JSON.stringify([
            {
                id: 1,
                name: "John"
            },
            {
                id: 2,
                name: "Sarah"
            }
        ]));

    } else {

        res.statusCode = 404;

        res.end(JSON.stringify({
            message: "Route not found"
        }));
    }
});

server.listen(3000, () => {
    console.log("Server running at http://localhost:3000");
});
This small server demonstrates the fundamental concepts you need to understand before moving to a web framework.
Conclusion
The Node.js HTTP module provides the basic functionality required to create HTTP servers without installing an external framework.
In this article, you learned how to:
- Import the HTTP module
- Create a Node.js web server
- Start a server with
listen()
- Handle requests
- Send responses
- Work with URLs
- Check HTTP methods
- Set status codes
- Set response headers
- Return HTML
- Return JSON
- Read request bodies
- Handle query parameters
- Build a basic REST API
The most important objects to remember are:
req → Incoming request
res → Outgoing response
And some of the most useful properties and methods are:
req.method
req.url
req.headers

res.statusCode
res.setHeader()
res.write()
res.end()
Although the HTTP module is powerful, manually handling routing and request processing can become complicated as an application grows. This is one of the reasons frameworks such as
Express.js are so popular in Node.js development.
Now that you understand how a basic Node.js HTTP server works, the next logical topic is
Express.js Routing: A Beginner’s Guide, where we will learn how Express makes routing much easier and cleaner.