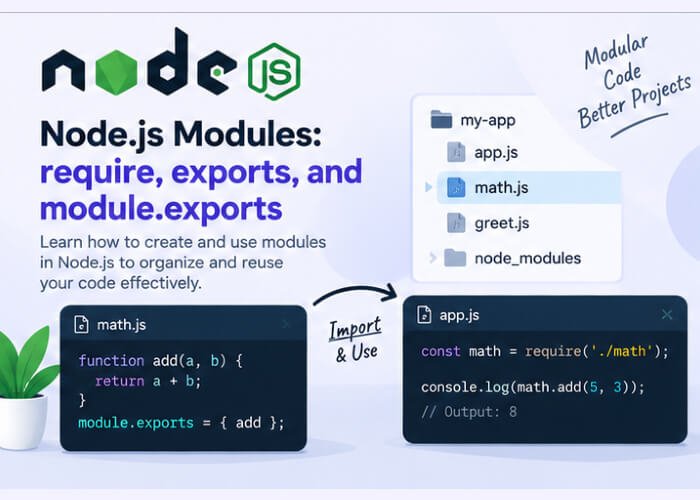
As Node.js applications become larger, putting all of your code inside a single JavaScript file quickly becomes difficult to manage.
Node.js solves this problem by allowing you to divide your application into smaller, reusable files called
modules.
For example, instead of putting user-related code, database code, and server code into one file, you can organize your project like this:
my-node-app/
│
├── app.js
├── user.js
├── database.js
└── utils.js
Each file can contain its own functionality and can share selected values or functions with other files.
In this article, you will learn:
- What Node.js modules are
- Why modules are useful
- How
require() works
- How
exports works
- How
module.exports works
- The difference between
exports and module.exports
- How to create and import custom modules
- Common mistakes beginners make
- CommonJS vs ES Modules
What is a Module in Node.js?
A
module is a reusable piece of code that is contained in a file.
In Node.js, each JavaScript file is treated as a separate module when using the CommonJS module system.
For example, suppose you have a file called:
math.js
You can put mathematical functions inside it:
function add(a, b) {
    return a + b;
}

function subtract(a, b) {
    return a - b;
}
You can then export these functions and use them in another file.
This allows you to divide your application into smaller and more manageable pieces.
Why Are Modules Important?
Modules provide several advantages.
1. Code Organization
Instead of keeping everything in one large file, you can divide your application into logical sections.
2. Code Reusability
A function written in one module can be reused in multiple parts of your application.
3. Easier Maintenance
Smaller files are generally easier to understand and maintain.
4. Avoiding Global Variables
Modules provide their own scope, which helps prevent variables from unintentionally affecting other parts of the application.
5. Separation of Responsibilities
You can create separate modules for:
- Authentication
- Users
- Database operations
- API routes
- Utility functions
- Configuration
- File processing
Types of Modules in Node.js
Node.js applications commonly work with three broad types of modules:
- Core modules
- Local/custom modules
- Third-party modules
Let’s understand each one.
1. Core Modules
Node.js provides many built-in modules that can be used without installing additional packages.
Examples include:
fspathhttposeventsurl
For example, you can use the File System module:
const fs = require("fs");

console.log("File System module loaded");
You don’t need to run
npm install fs because it is provided by Node.js.
2. Local Modules
Local modules are modules that you create yourself.
For example:
project/
│
├── app.js
└── math.js
The
math.js file can contain your own functions.
You can then import them into
app.js.
3. Third-Party Modules
Third-party modules are packages created by other developers and installed using npm.
For example:
npm install express
Then:
const express = require("express");
Express is a third-party package.
You learned how npm installs and manages these packages in the previous article:
Understanding npm and package.json in Node.js
What is require()?
In the CommonJS module system,
require() is used to load a module into another file.
For example:
const math = require("./math");
Here:
require()
loads the module, while:
./math
specifies the module we want to load.
The
./ means that the module is located relative to the current file.
Creating Your First Custom Module
Let’s create a simple example.
Create a file called:
math.js
Add:
function add(a, b) {
    return a + b;
}

module.exports = add;
Now create:
app.js
Add:
const add = require("./math");

const result = add(10, 20);

console.log(result);
Run:
node app.js
Output:
30
Here is what happened:
app.js
   ↓
require("./math")
   ↓
math.js
   ↓
module.exports = add
   ↓
add function returned to app.js
This is the basic idea behind Node.js modules.
Understanding module.exports
module.exports is the value that a CommonJS module makes available to other files.
For example:
function add(a, b) {
    return a + b;
}

module.exports = add;
The
add function is now exported from the module.
Another file can import it:
const add = require("./math");
The value returned by
require("./math") is the value assigned to
module.exports.
So:
module.exports = add;
means:
“When another file requires this module, give it the add function.”
Exporting Multiple Functions
You can export multiple functions using an object.
For example:
function add(a, b) {
    return a + b;
}

function subtract(a, b) {
    return a - b;
}

function multiply(a, b) {
    return a * b;
}

module.exports = {
    add,
    subtract,
    multiply
};
Now another file can import the module:
const math = require("./math");

console.log(math.add(10, 5));
console.log(math.subtract(10, 5));
console.log(math.multiply(10, 5));
Output:
15
5
50
Destructuring Imported Modules
Instead of writing:
const math = require("./math");

console.log(math.add(10, 5));
you can use JavaScript destructuring:
const { add, subtract, multiply } = require("./math");

console.log(add(10, 5));
console.log(subtract(10, 5));
console.log(multiply(10, 5));
This can make the code shorter and easier to read when you only need specific functions.
What is exports?
Node.js also provides an
exports object that can be used as a convenient way to add properties to
module.exports.
For example:
exports.add = function(a, b) {
    return a + b;
};

exports.subtract = function(a, b) {
    return a - b;
};
This is effectively adding properties to the module’s exported object.
You can import it using:
const math = require("./math");

console.log(math.add(10, 5));
console.log(math.subtract(10, 5));
exports vs module.exports
This is one of the most important concepts to understand.
Initially, Node.js provides a relationship similar to:
exports = module.exports;
Both refer to the same object initially.
Therefore, this works:
exports.add = function(a, b) {
    return a + b;
};
And this also works:
module.exports.add = function(a, b) {
    return a + b;
};
However, there is an important difference when you
reassign them.
Why exports = Does Not Work as Expected
Consider this:
exports = function(a, b) {
    return a + b;
};
This does
not replace the value that the module exports.
Why?
Because you have reassigned the local
exports variable.
The original relationship between
exports and
module.exports is broken.
For example:
exports = {
    add: function(a, b) {
        return a + b;
    }
};
If you then do:
const math = require("./math");
you will not receive the new object assigned to
exports.
The Correct Way to Export a Single Function
If you want your entire module to export one function, use:
module.exports = function(a, b) {
    return a + b;
};
Then:
const add = require("./math");

console.log(add(10, 20));
This works because
module.exports is the actual value returned by
require().
A Simple Rule to Remember
For beginners, remember this rule:
Use exports.property for adding properties
exports.add = add;
exports.subtract = subtract;
Use module.exports when replacing the entire exported value
module.exports = add;
This distinction will save you from many CommonJS module errors.
Exporting an Object
You can export an object directly:
const user = {
    name: "John",
    age: 25
};

module.exports = user;
Then import it:
const user = require("./user");

console.log(user.name);
console.log(user.age);
Output:
John
25
Exporting a Class
You can also export a class.
For example:
class User {
    constructor(name) {
        this.name = name;
    }

    sayHello() {
        return `Hello, ${this.name}`;
    }
}

module.exports = User;
Import it:
const User = require("./User");

const user = new User("John");

console.log(user.sayHello());
Output:
Hello, John
Exporting Constants
You can export constants as well.
const appName = "Developers Ground";
const version = "1.0.0";

module.exports = {
    appName,
    version
};
Then:
const config = require("./config");

console.log(config.appName);
console.log(config.version);
Understanding File Paths with require()
When importing your own modules, you generally use a relative path.
For example:
const math = require("./math");
The
./ means:
Look for math in the current directory.
If the file is inside another directory:
project/
│
├── app.js
└── utils/
    └── math.js
You can import it using:
const math = require("./utils/math");
To go up one directory, use:
../
For example:
const helper = require("../helper");
A Realistic Project Example
Consider a Node.js application with this structure:
my-app/
│
├── app.js
├── controllers/
│   └── userController.js
│
├── utils/
│   └── response.js
│
└── config/
    └── database.js
The user controller could export functions:
function getUsers(req, res) {
    res.json([
        {
            id: 1,
            name: "John"
        },
        {
            id: 2,
            name: "Sarah"
        }
    ]);
}

function getUser(req, res) {
    res.json({
        id: req.params.id,
        name: "John"
    });
}

module.exports = {
    getUsers,
    getUser
};
Then a route file can import them:
const {
    getUsers,
    getUser
} = require("../controllers/userController");
This approach helps keep different parts of an application separated.
CommonJS Modules
The examples above use the
CommonJS module system.
CommonJS is traditionally associated with syntax such as:
const express = require("express");
and:
module.exports = something;
Many existing Node.js applications use CommonJS.
ES Modules
Node.js also supports
ECMAScript Modules (ES Modules or ESM).
ES Modules use:
import
and:
export
For example:
export function add(a, b) {
    return a + b;
}
Then:
import { add } from "./math.js";
This is different from CommonJS:
const { add } = require("./math");
CommonJS vs ES Modules
Here is a simple comparison:
| CommonJS |
ES Modules |
require() |
import |
module.exports |
export |
exports.name |
export / export default |
| Common in older Node.js projects |
Modern JavaScript module standard |
require("./file") |
import ... from "./file.js" |
Both systems are important to understand when working with Node.js projects.
How to Enable ES Modules
One common way to tell Node.js that a project uses ES Modules is to add:
{
    "type": "module"
}
to
package.json.
For example:
{
    "name": "my-node-app",
    "version": "1.0.0",
    "type": "module"
}
You can then use:
import express from "express";
instead of:
const express = require("express");
The exact module system you use should be consistent with how your project is configured.
Common Beginner Mistakes
Mistake 1: Using exports = Instead of module.exports =
Incorrect:
exports = function() {
    console.log("Hello");
};
Correct:
module.exports = function() {
    console.log("Hello");
};
If you want to add a property:
exports.hello = function() {
    console.log("Hello");
};
Mistake 2: Forgetting the Relative Path
When importing a local module, don’t forget
./.
Incorrect:
const math = require("math");
Correct:
const math = require("./math");
The first form is generally interpreted as a package/module lookup rather than a local file.
Mistake 3: Exporting One Thing and Importing It Incorrectly
If you have:
module.exports = add;
then use:
const add = require("./math");
Don’t expect it to behave like an object containing an
add property.
If you want:
const { add } = require("./math");
then export an object:
module.exports = {
    add
};
A Complete Example
Let’s create a small project:
calculator/
│
├── app.js
└── calculator.js
calculator.js
function add(a, b) {
    return a + b;
}

function subtract(a, b) {
    return a - b;
}

function multiply(a, b) {
    return a * b;
}

function divide(a, b) {
    if (b === 0) {
        throw new Error("Cannot divide by zero");
    }

    return a / b;
}

module.exports = {
    add,
    subtract,
    multiply,
    divide
};
app.js
const {
    add,
    subtract,
    multiply,
    divide
} = require("./calculator");

console.log("Addition:", add(10, 5));
console.log("Subtraction:", subtract(10, 5));
console.log("Multiplication:", multiply(10, 5));
console.log("Division:", divide(10, 5));
Run the application:
node app.js
Output:
Addition: 15
Subtraction: 5
Multiplication: 50
Division: 2
This is a simple but practical example of how modules allow you to separate functionality into different files.
Best Practices for Node.js Modules
When creating larger Node.js applications, keep these practices in mind:
Keep Modules Focused
A module should ideally have a clear responsibility.
For example:
userController.js
database.js
auth.js
email.js
are easier to understand than one massive file containing everything.
Export Only What Is Needed
Don’t expose internal implementation details unnecessarily.
Use Clear Names
Use descriptive names for modules and exported functions.
Keep Consistent Module Syntax
Avoid mixing CommonJS and ES Module syntax unnecessarily. Follow the module system configured for your project.
Organize Large Applications
As your application grows, separate routes, controllers, services, models, and utilities into appropriate modules.
Conclusion
Modules are one of the fundamental concepts in Node.js development.
They allow you to divide a large application into smaller, reusable, and maintainable pieces of code.
The most important CommonJS concepts to remember are:
require()
Used to load a module.
module.exports
Used to define what a module makes available to other files.
exports
A convenient reference that can be used to add properties to the module’s exports.
The key difference is:
exports.add = add;
adds a property to the exported object, while:
module.exports = add;
replaces the module’s exported value with the
add function.
Once you understand modules,
require(),
exports, and
module.exports, you will be much more comfortable working with real-world Node.js projects.
In the next article, a natural topic to learn is
Node.js File System (fs) Module: Read and Write Files, where you will learn how Node.js can create, read, update, and delete files directly from your server-side JavaScript code.