If you are learning backend development with JavaScript, you have probably heard about
Node.js and
Express.js. Together, they provide a simple and powerful way to build web servers, REST APIs, and backend applications using JavaScript.
In this article, we will understand what Node.js and Express.js are, how they work, how to create your first Express server, and how to handle routes and requests.
What is Node.js?
Node.js is a JavaScript runtime that allows you to execute JavaScript outside the browser.
Normally, JavaScript runs inside browsers such as Chrome, Firefox, or Edge. Node.js uses Google’s
V8 JavaScript engine to run JavaScript on a server.
With Node.js, developers can use JavaScript to build:
- Web servers
- REST APIs
- Backend applications
- Real-time applications
- Command-line tools
- Microservices
- Database-driven applications
For example, a simple Node.js program can be written as:
console.log("Hello from Node.js!");
You can save this code in a file called
app.js and run it using:
node app.js
The output will be:
Hello from Node.js!
Why Use Node.js?
One of the biggest advantages of Node.js is that you can use JavaScript for both frontend and backend development.
Some important features of Node.js are:
1. JavaScript on the Server
Node.js allows developers to write server-side applications using JavaScript.
2. Fast Execution
Node.js is powered by the V8 JavaScript engine, which compiles JavaScript into machine code for fast execution.
3. Asynchronous Programming
Node.js is designed around asynchronous, non-blocking operations. This makes it suitable for applications that handle many requests and I/O operations.
4. Large Package Ecosystem
Node.js comes with
npm (Node Package Manager), which provides access to a large collection of reusable packages.
For example:
npm install express
This command installs Express.js into your project.
What is Express.js?
Express.js is a lightweight web framework built on top of Node.js.
Node.js provides the runtime environment, while Express.js provides convenient tools for building web applications and APIs.
Without Express.js, you can create a server using Node’s built-in
http module:
const http = require("http");

const server = http.createServer((req, res) => {
    res.end("Hello World");
});

server.listen(3000);
This works, but handling multiple routes, requests, middleware, and APIs can become complicated.
Express.js makes these tasks much easier.
For example:
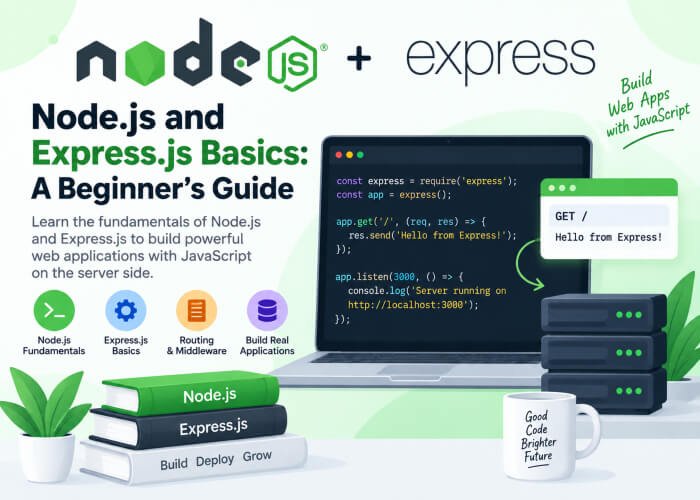
const express = require("express");

const app = express();

app.get("/", (req, res) => {
    res.send("Hello World");
});

app.listen(3000, () => {
    console.log("Server running on port 3000");
});
This creates a basic web server with Express.js.
Node.js vs Express.js
It is important to understand the difference between Node.js and Express.js.
| Node.js |
Express.js |
| JavaScript runtime |
Web framework |
| Runs JavaScript outside the browser |
Runs on Node.js |
| Provides low-level server functionality |
Simplifies web development |
Includes modules such as http and fs |
Provides routing and middleware |
| Can create servers without Express |
Requires Node.js |
In simple terms:
Node.js = Runtime environment
Express.js = Web framework running on Node.js
Installing Node.js
Before creating an Express.js application, you need to install Node.js.
After installation, verify that Node.js is available on your system:
node -v
You can also check npm:
npm -v
If both commands return version numbers, Node.js and npm are installed successfully.
Creating Your First Node.js Project
Create a new directory for your project:
mkdir express-basics
Move into the directory:
cd express-basics
Initialize a Node.js project:
npm init -y
This creates a
package.json file.
The
package.json file contains important information about your project, including its dependencies and scripts.
Installing Express.js
Now install Express.js:
npm install express
After installation, Express will be added to the project’s dependencies.
Your project structure will look similar to:
express-basics/
│
├── node_modules/
├── package.json
├── package-lock.json
└── app.js
Create an
app.js file for your application.
Creating Your First Express Server
Add the following code to
app.js:
const express = require("express");

const app = express();

app.get("/", (req, res) => {
    res.send("Welcome to Developers Ground!");
});

app.listen(3000, () => {
    console.log("Server is running on port 3000");
});
Start the application:
node app.js
You should see:
Server is running on port 3000
Now open your browser and visit:
http://localhost:3000
You should see:
Welcome to Developers Ground!
Congratulations! You have created your first Express.js server.
Understanding the Express.js Code
Let’s understand what each part of the code does.
Import Express
const express = require("express");
This loads the Express.js package into your application.
Create the Application
const app = express();
The
express() function creates an Express application.
The
app object is used to configure your server, routes, and middleware.
Create a Route
app.get("/", (req, res) => {
    res.send("Welcome to Developers Ground!");
});
This creates a GET route for
/.
When someone visits:
http://localhost:3000/
Express executes the callback function.
The two parameters are:
req — Request objectres — Response object
The response is sent using:
res.send("Welcome to Developers Ground!");
Start the Server
app.listen(3000, () => {
    console.log("Server is running on port 3000");
});
This starts the Express server on port
3000.
Express.js Routing
Routing determines how an application responds to different URLs and HTTP methods.
For example:
app.get("/", (req, res) => {
    res.send("Home Page");
});

app.get("/about", (req, res) => {
    res.send("About Page");
});

app.get("/contact", (req, res) => {
    res.send("Contact Page");
});
Now you can access:
/
 /about
 /contact
Each URL produces a different response.
HTTP Methods in Express.js
Express supports different HTTP methods that are commonly used when creating APIs.
The most common methods are:
- GET
- POST
- PUT
- PATCH
- DELETE
GET
GET is generally used to retrieve data.
app.get("/users", (req, res) => {
    res.send("List of users");
});
POST
POST is generally used to create new data.
app.post("/users", (req, res) => {
    res.send("User created");
});
PUT
PUT is commonly used to update an existing resource.
app.put("/users/1", (req, res) => {
    res.send("User updated");
});
DELETE
DELETE is used to remove a resource.
app.delete("/users/1", (req, res) => {
    res.send("User deleted");
});
Request and Response Objects
Express provides two important objects to route handlers:
req
res
The
req object contains information about the incoming request.
The
res object is used to send a response back to the client.
For example:
app.get("/hello", (req, res) => {
    console.log(req.method);
    console.log(req.url);

    res.send("Hello!");
});
If you visit
/hello, Express receives the request and sends the response.
Route Parameters
Route parameters allow you to capture values from a URL.
For example:
app.get("/users/:id", (req, res) => {
    res.send(`User ID: ${req.params.id}`);
});
If you visit:
/users/25
The response will be:
User ID: 25
The value
25 is available through:
req.params.id
Route parameters are particularly useful when working with database records.
Query Parameters
Query parameters are another way of sending information through a URL.
For example:
/products?category=mobile
You can access the query parameter using:
app.get("/products", (req, res) => {
    console.log(req.query.category);

    res.send(`Category: ${req.query.category}`);
});
For the URL:
/products?category=mobile
The value of
req.query.category will be:
mobile
Multiple query parameters can also be used:
/products?category=mobile&brand=samsung
Middleware in Express.js
Middleware is one of the most important concepts in Express.js.
Middleware functions execute during the request-response cycle.
A middleware function can:
- Execute code
- Modify the request
- Modify the response
- End the request
- Pass control to another middleware
A simple middleware example:
app.use((req, res, next) => {
    console.log("Request received");

    next();
});
The
next() function tells Express to continue to the next middleware or route handler.
For example:
const express = require("express");

const app = express();

app.use((req, res, next) => {
    console.log(`${req.method} ${req.url}`);
    next();
});

app.get("/", (req, res) => {
    res.send("Home Page");
});

app.listen(3000);
Whenever a request is received, the middleware logs the request method and URL.
Handling JSON Data
Express provides middleware for parsing JSON request bodies.
Add:
app.use(express.json());
Now you can handle JSON data sent through a POST request.
Example:
app.use(express.json());

app.post("/users", (req, res) => {
    console.log(req.body);

    res.json({
        message: "User created",
        user: req.body
    });
});
A client can send:
{
    "name": "John",
    "email": "john@example.com"
}
The data can then be accessed through:
req.body
Sending JSON Responses
Express makes it easy to return JSON responses.
For example:
app.get("/api/users", (req, res) => {
    res.json([
        {
            id: 1,
            name: "John"
        },
        {
            id: 2,
            name: "Sarah"
        }
    ]);
});
The API will return:
[
    {
        "id": 1,
        "name": "John"
    },
    {
        "id": 2,
        "name": "Sarah"
    }
]
This is commonly used when building REST APIs for frontend applications.
Creating a Simple REST API
Let’s combine some of the concepts we have learned and create a small API.
const express = require("express");

const app = express();

app.use(express.json());

let users = [
    {
        id: 1,
        name: "John"
    },
    {
        id: 2,
        name: "Sarah"
    }
];

app.get("/api/users", (req, res) => {
    res.json(users);
});

app.get("/api/users/:id", (req, res) => {
    const user = users.find(
        user => user.id === Number(req.params.id)
    );

    if (!user) {
        return res.status(404).json({
            message: "User not found"
        });
    }

    res.json(user);
});

app.post("/api/users", (req, res) => {
    const user = {
        id: users.length + 1,
        name: req.body.name
    };

    users.push(user);

    res.status(201).json(user);
});

app.delete("/api/users/:id", (req, res) => {
    const id = Number(req.params.id);

    users = users.filter(user => user.id !== id);

    res.json({
        message: "User deleted"
    });
});

app.listen(3000, () => {
    console.log("API running on port 3000");
});
This simple application demonstrates several important Express.js concepts:
- Routing
- GET requests
- POST requests
- DELETE requests
- Route parameters
- JSON request bodies
- JSON responses
- HTTP status codes
HTTP Status Codes
When creating APIs, it is important to return appropriate HTTP status codes.
Some commonly used status codes are:
| Status Code |
Meaning |
| 200 |
OK |
| 201 |
Created |
| 204 |
No Content |
| 400 |
Bad Request |
| 401 |
Unauthorized |
| 403 |
Forbidden |
| 404 |
Not Found |
| 500 |
Internal Server Error |
For example:
res.status(404).json({
    message: "User not found"
});
For a successfully created resource:
res.status(201).json({
    message: "User created"
});
Using proper status codes makes APIs easier for frontend developers and other clients to understand.
Error Handling
Applications need to handle errors properly.
Express supports error-handling middleware.
A basic example is:
app.use((err, req, res, next) => {
    console.error(err);

    res.status(500).json({
        message: "Something went wrong"
    });
});
This middleware can handle errors passed through the Express request pipeline.
In production applications, error handling should be designed carefully so that users receive useful responses without exposing sensitive server information.
Using Environment Variables
Applications often need configuration values such as:
- Database URLs
- API keys
- Application ports
- Secret keys
These values should generally not be hard-coded directly into your source code.
Node.js applications can use environment variables.
For example:
const port = process.env.PORT || 3000;

app.listen(port, () => {
    console.log(`Server running on port ${port}`);
});
You can then configure the
PORT environment variable in your deployment environment.
For applications using a
.env file, developers commonly use a package such as
dotenv.
Common Express.js Project Structure
As an application grows, keeping everything inside one file becomes difficult.
A common structure is:
my-app/
│
├── controllers/
│   └── userController.js
│
├── routes/
│   └── userRoutes.js
│
├── middleware/
│   └── authMiddleware.js
│
├── models/
│   └── userModel.js
│
├── config/
│   └── database.js
│
├── app.js
├── package.json
└── package-lock.json
This separates different responsibilities and makes the application easier to maintain.
Node.js and Express.js with Databases
Express.js can be connected to different databases.
Common choices include:
- MySQL
- PostgreSQL
- MongoDB
- SQLite
- Redis
- Other databases with Node.js-compatible drivers
A typical backend application follows a flow similar to:
Client
   ↓
Express Route
   ↓
Controller
   ↓
Database
   ↓
Controller
   ↓
JSON Response
   ↓
Client
For example, when a frontend application requests:
GET /api/users
Express receives the request, the application retrieves users from the database, and the server sends the result back as JSON.
Node.js and Express.js for Full-Stack Development
Node.js and Express.js are commonly used with frontend technologies such as:
- React
- Angular
- Vue
- HTML, CSS and JavaScript
For example, a React application might communicate with an Express.js API:
React Application
       ↓
   HTTP Request
       ↓
Express.js API
       ↓
     Node.js
       ↓
    Database
The backend can return JSON data that the frontend uses to display information.
This makes Node.js and Express.js particularly useful for full-stack JavaScript development.
Node.js and Express.js Best Practices
When developing real-world applications, keep the following practices in mind:
Use a Proper Project Structure
Separate routes, controllers, middleware, configuration, and database logic as your project grows.
Validate User Input
Never blindly trust data received from users or external clients.
Handle Errors
Use appropriate error-handling middleware and HTTP status codes.
Protect Sensitive Information
Do not commit passwords, API keys, database credentials, or other secrets to source control.
Use Environment Variables
Keep environment-specific configuration outside your application code.
Keep Routes Simple
Avoid putting large amounts of business logic directly inside route handlers.
Instead of:
app.get("/users", (req, res) => {
    // Lots of business logic here
});
Use a controller:
app.get("/users", userController.getUsers);
This makes the application easier to maintain.
Conclusion
Node.js allows developers to run JavaScript on the server, while Express.js provides a convenient framework for building web applications and APIs on top of Node.js.
By learning the fundamentals of Node.js and Express.js, you can start building:
- Web servers
- REST APIs
- Backend applications
- Authentication systems
- Database-driven applications
- Full-stack JavaScript applications
The most important concepts to learn first are
Node.js fundamentals, npm, Express application setup, routing, HTTP methods, middleware, request/response objects, JSON data, status codes, and error handling.
Once you understand these concepts, you can move on to more advanced topics such as database integration, authentication, JWT, API security, file uploads, validation, testing, and application deployment.
Next step: Build a small CRUD API using Express.js. Creating an application that can create, read, update, and delete users is an excellent way to practice the concepts covered in this article.