







State in React
In the last post, you learned that props let a component receive data from its parent, but that data is read-only and can’t be changed by the component itself. So what happens when you need a component to remember and update its own data — like a counter that increases when clicked, a form field the user is typing into, or a toggle that switches on and off?
That’s exactly what state is for.
What Is State?
State is data that a component manages internally, and that can change over time as a result of user interaction, network responses, or other events. Unlike props, state is:
- Owned by the component itself (not passed in from outside)
- Mutable (it can change) — but only through the proper update mechanism, never directly
- The reason a component re-renders and updates what’s shown on screen
Whenever state changes, React automatically re-renders the component to reflect the new data — this is the core mechanism that makes React apps feel interactive and “alive.”
Introducing the useState Hook
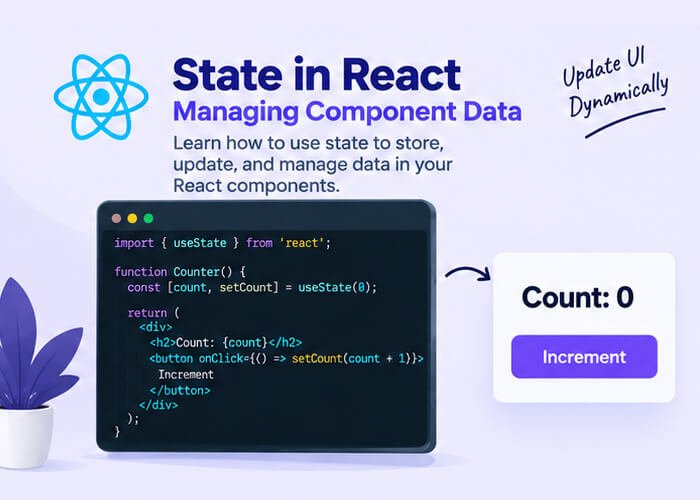
In modern React (functional components), state is managed using the useState hook. Let’s look at a simple counter example:
import { useState } from 'react'

function Counter() {
  const [count, setCount] = useState(0)

  return (
    <div>
      <p>Count: {count}</p>
      <button onClick={() => setCount(count + 1)}>Increment</button>
    </div>
  )
}

export default Counter
Let’s break this down piece by piece.
1. Importing useState
import { useState } from 'react'useState is a hook — a special function that lets functional components “hook into” React features like state and lifecycle behavior. We’ll cover hooks more broadly in a later post, but for now, just know that useState is the hook responsible for adding state to a component.
2. Declaring State
const [count, setCount] = useState(0)This single line does a lot:
useState(0)initializes a piece of state with a starting value of0- It returns an array with exactly two items: the current value (
count) and a function to update it (setCount) - We use array destructuring to pull those two items into clearly named variables
You can name these variables anything you like, but the convention is [value, setValue]:
const [name, setName] = useState("")
const [isOpen, setIsOpen] = useState(false)
const [items, setItems] = useState([])
3. Updating State
<button onClick={() => setCount(count + 1)}>Increment</button>To update state, you call the setter function (setCount) — you never modify the state variable directly. Calling setCount(count + 1) tells React: “update the count state to this new value, and re-render this component.”
Why You Can’t Update State Directly
You might wonder why this doesn’t work:
count = count + 1 // ❌ This does nothing usefulThe reason is that React needs to know when state changes so it can trigger a re-render and update the UI. Simply reassigning a variable doesn’t notify React of anything — it just changes a value in memory without React ever finding out. Calling the setter function (setCount) is what actually triggers React’s re-rendering process.
This is a core rule in React: always update state through its setter function, never by direct mutation.
State with Different Data Types
State isn’t limited to numbers — it can hold strings, booleans, arrays, objects, or anything else.
String State (e.g., form input)
function NameInput() {
  const [name, setName] = useState("")

  return (
    <div>
      <input
        type="text"
        value={name}
        onChange={(e) => setName(e.target.value)}
      />
      <p>Hello, {name}</p>
    </div>
  )
}
Boolean State (e.g., toggles)
function ToggleBox() {
  const [isOpen, setIsOpen] = useState(false)

  return (
    <div>
      <button onClick={() => setIsOpen(!isOpen)}>
        {isOpen ? "Close" : "Open"}
      </button>
      {isOpen && <p>This content is now visible!</p>}
    </div>
  )
}
Array State (e.g., a to-do list)
function TodoList() {
  const [todos, setTodos] = useState([])
  const [input, setInput] = useState("")

  const addTodo = () => {
    setTodos([...todos, input])
    setInput("")
  }

  return (
    <div>
      <input value={input} onChange={(e) => setInput(e.target.value)} />
      <button onClick={addTodo}>Add</button>
      <ul>
        {todos.map((todo, index) => (
          <li key={index}>{todo}</li>
        ))}
      </ul>
    </div>
  )
}
Notice setTodos([...todos, input]) — instead of pushing directly into the existing array, we create a brand-new array using the spread operator (...todos) and add the new item to it. This leads us to one of the most important rules of working with state.
Never Mutate State Directly
Whether you’re working with arrays, objects, or any other reference type, always create a new copy rather than modifying the existing state directly.
Incorrect (mutating state directly):
todos.push(input)   // ❌ Mutates the existing array
setTodos(todos)
Correct (creating a new array):
setTodos([...todos, input]) // ✅ Creates a new arrayThe same principle applies to objects:
Incorrect:
user.name = "New Name"   // ❌ Mutates the existing object
setUser(user)
Correct:
setUser({ ...user, name: "New Name" }) // ✅ Creates a new objectReact relies on detecting that the state reference has changed to know it needs to re-render. If you mutate the existing object or array in place, React may not detect the change at all, leading to bugs where your UI silently fails to update.
State Updates Are Asynchronous
Another common source of confusion: state updates don’t happen immediately. Consider this code:
const [count, setCount] = useState(0)

const handleClick = () => {
  setCount(count + 1)
  console.log(count) // Still logs the OLD value, not the updated one
}
React batches state updates for performance reasons, and the component doesn’t re-render (and count doesn’t reflect its new value) until after the current function finishes executing. If you need to update state based on its previous value, use the functional update form instead:
setCount((prevCount) => prevCount + 1)This is especially important when you’re calling the setter multiple times in a row or inside asynchronous code, since it guarantees you’re always working with the most up-to-date value.
Each Component Has Its Own Isolated State
If you render the same component multiple times, each instance gets its own independent state — they don’t share or interfere with each other.
function App() {
  return (
    <div>
      <Counter />
      <Counter />
      <Counter />
    </div>
  )
}
Clicking the increment button on one Counter will only affect that specific instance’s count — the other two remain unaffected. This isolation is what makes components reusable and predictable.
Common Mistakes Beginners Make
- Mutating state directly instead of using the setter function (
todos.push()instead ofsetTodos([...todos, newItem])). - Expecting state to update immediately after calling the setter, instead of understanding its asynchronous nature.
- Using the wrong initial value type — for example, initializing with
useState()(undefined) when you actually needuseState([])oruseState(""). - Forgetting to use the functional update form (
prevState => ...) when the new state depends on the previous state. - Declaring state inside conditionals or loops, which violates React’s Rules of Hooks (we’ll cover this rule in more detail in the hooks post).
Recap
In this post, you learned:
- What state is and how it differs from props
- How to declare and update state using the
useStatehook - How to work with different state data types: strings, booleans, arrays, and objects
- Why state must never be mutated directly, and how to correctly update arrays and objects
- Why state updates are asynchronous, and how to handle updates that depend on previous state
- That each component instance maintains its own independent state
You now understand the two most fundamental concepts in React: props (data passed in) and state (data managed internally). In the next post, we’ll build on this by exploring how to respond to user interactions — clicks, typing, form submissions, and more — through event handling in React.


1 Comment
Pingback: Props in React - Developers Ground