





Introduction
we have explored the core programming fundamentals of JavaScript—from variables and data types to functions, arrays, and objects.
However, all our code so far has run in the isolation of the console. The real magic happens when JavaScript connects directly to the browser window, turning a static HTML page into an interactive, dynamic application.
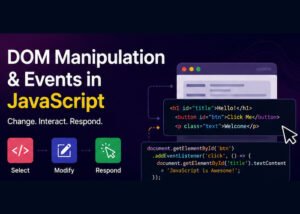
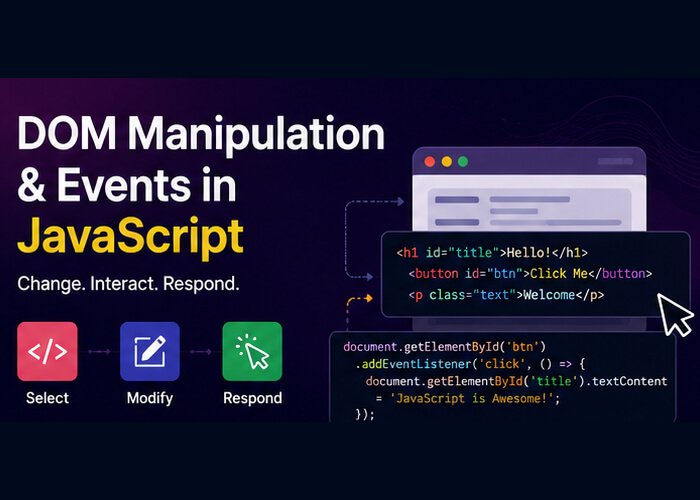
To do that, you need to understand two key concepts: the Document Object Model (DOM) and Event Handling.
What is the DOM (Document Object Model)?
When a browser loads an HTML document, it translates the raw markup into a structured tree of JavaScript objects. This tree is known as the Document Object Model (DOM).
Every element—from <body> down to a single <span> or <button>—becomes a node in this tree that JavaScript can read, modify, add, or remove in real time.
       document
          │
        <html>
       /      \
   <head>     <body>
     │        /    \
  <title>   <h1>   <button>
The global entry point provided by the browser to interact with this tree is the document object.
1. Selecting Elements from the DOM
Before you can change an element, you need to grab a reference to it. Modern JavaScript relies primarily on two versatile methods: querySelector and querySelectorAll.
// 1. querySelector - returns the FIRST matching element (or null)
const heading = document.querySelector("#main-title");    // By ID
const submitBtn = document.querySelector(".btn-primary"); // By Class
const firstInput = document.querySelector("input");       // By Tag Name

// 2. querySelectorAll - returns a NodeList of ALL matching elements
const listItems = document.querySelectorAll(".menu-item");

// You can iterate over a NodeList directly using forEach:
listItems.forEach(item => {
  console.log(item.textContent);
});
Classic Selectors (Good to Know)
You may also encounter legacy methods in existing codebases:
document.getElementById('header')document.getElementsByClassName('card')(returns an HTMLCollection)document.getElementsByTagName('p')
2. Modifying Content, Attributes & Styles
Once you have selected an element, you can dynamically update what it displays and how it looks.
Changing Text & HTML Content
textContent: Gets or sets the plain text inside an element (safe against Cross-Site Scripting / XSS).innerHTML: Parses and renders HTML tags passed inside a string.
const banner = document.querySelector(".announcement");

// Updating plain text
banner.textContent = "Flash Sale ends tonight!";

// Injecting HTML markup
banner.innerHTML = "<strong>Alert:</strong> Scheduled maintenance at midnight.";
Modifying Attributes
const userAvatar = document.querySelector("#avatar-img");

// Set an attribute
userAvatar.setAttribute("src", "https://example.com/profile.png");
userAvatar.setAttribute("alt", "User profile picture");

// Get or check an attribute
console.log(userAvatar.getAttribute("src")); // "https://example.com/profile.png"
console.log(userAvatar.hasAttribute("disabled")); // false
Toggling Classes & Styling
Direct inline styles (element.style.color = "blue") can quickly become unmanageable. The modern standard is to toggle CSS classes using classList:
const modal = document.querySelector(".modal");

modal.classList.add("is-visible");       // Adds a class
modal.classList.remove("is-hidden");     // Removes a class
modal.classList.toggle("dark-mode");     // Adds if missing, removes if present
modal.classList.contains("is-visible");  // Returns true or false
3. Creating & Removing Elements Dynamically
You can generate brand-new elements from scratch and attach them to the page:
// 1. Create the new element
const newCard = document.createElement("div");

// 2. Add classes and content
newCard.classList.add("card");
newCard.textContent = "Automated Test Suite Completed Successfully.";

// 3. Append to a parent container in the DOM
const container = document.querySelector("#results-container");
container.appendChild(newCard); // Appends to the end

// 4. Removing an element
newCard.remove(); // Removes the element directly from the DOM
4. Handling Events: Making the Page Interactive
An event is a signal that something occurred in the browser—such as a button click, a key press, a form submission, or a mouse scroll.
To listen and respond to an event, we attach an Event Listener using addEventListener.
Basic Event Listener Syntax
const button = document.querySelector("#cta-button");

button.addEventListener("click", () => {
  console.log("Button was clicked!");
});
The Event Object (e or event)
When an event fires, the browser automatically passes an Event Object containing metadata about the interaction (e.g., coordinate positions, keys pressed, target element).
const searchInput = document.querySelector("#search-box");

searchInput.addEventListener("keydown", (event) => {
  console.log(`Key pressed: ${event.key}`);

  if (event.key === "Enter") {
    console.log(`Searching for: ${event.target.value}`);
  }
});
Preventing Default Behavior (preventDefault)
Certain elements have default browser behaviors (e.g., submitting a form refreshes the page; clicking an anchor link navigates to a URL). You can intercept this using e.preventDefault():
const loginForm = document.querySelector("#login-form");

loginForm.addEventListener("submit", (e) => {
  e.preventDefault(); // Prevents the browser from refreshing

  const email = document.querySelector("#email-input").value;
  console.log(`Submitting data for: ${email}`);
});
5. Event Bubbling & Event Delegation
Understanding event propagation is essential for writing efficient JavaScript.
What is Event Bubbling?
When an event triggers on an element (like a button inside a card), it does not just stay on that button. It bubbles upthrough its parent elements all the way to window, triggering listeners along the way.
[Window] ↑
  [document] ↑
    [<body>] ↑
      [<div class="card">] ↑
        [<button>] (Event origin / target)
Event Delegation: Managing Dynamic Elements Efficiently
Imagine a list with 100 items. Instead of attaching 100 separate click listeners, you attach a single listener to the parent element and let bubbling do the work.
const taskList = document.querySelector("#task-list");

taskList.addEventListener("click", (event) => {
  // Check if the clicked target is a delete button
  if (event.target.classList.contains("delete-btn")) {
    const parentItem = event.target.closest("li");
    parentItem.remove();
    console.log("Task deleted!");
  }
});
Why this matters: Event delegation uses significantly less memory and automatically works for new elements added to the list later.
Practical Mini-Project: Interactive Dynamic Counter
Here is a complete, real-world example putting these concepts together:
<div class="counter-card">
  <h2 id="counter-value">0</h2>
  <button id="decrement-btn">-</button>
  <button id="reset-btn">Reset</button>
  <button id="increment-btn">+</button>
</div>
// State
let count = 0;

// Element References
const display = document.querySelector("#counter-value");
const incBtn = document.querySelector("#increment-btn");
const decBtn = document.querySelector("#decrement-btn");
const resetBtn = document.querySelector("#reset-btn");

// Helper function to update UI
function updateDisplay() {
  display.textContent = count;

  if (count > 0) {
    display.style.color = "#16a34a"; // Green
  } else if (count < 0) {
    display.style.color = "#dc2626"; // Red
  } else {
    display.style.color = "#1f2937"; // Neutral
  }
}

// Event Listeners
incBtn.addEventListener("click", () => {
  count++;
  updateDisplay();
});

decBtn.addEventListener("click", () => {
  count--;
  updateDisplay();
});

resetBtn.addEventListener("click", () => {
  count = 0;
  updateDisplay();
});


