





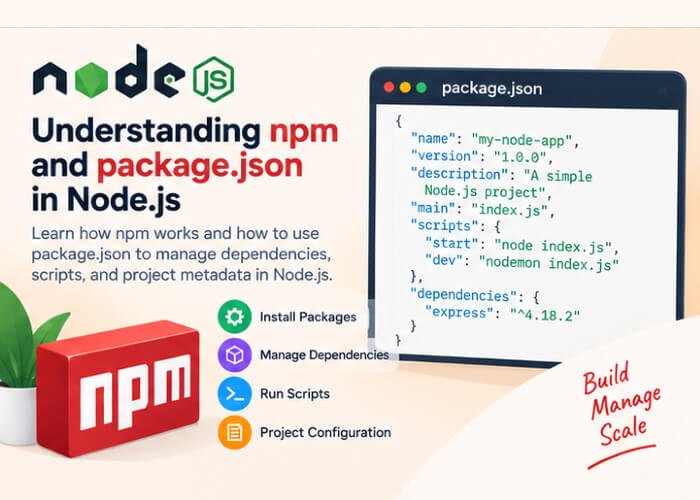
When working with Node.js, two things you will use almost every day are npm and package.json.
If you are new to Node.js, you may have seen commands such as:
npm init
npm install express
npm install
npm uninstall express
But what exactly is npm? What is package.json? What is package-lock.json? And what is the difference between dependencies and devDependencies?
In this beginner-friendly guide, we will answer these questions and learn how npm and package.json work together in a Node.js project.
What is npm?
npm stands for Node Package Manager.
It is the default package manager commonly used with Node.js. npm allows developers to install, manage, update, and remove packages that can be used in their Node.js applications.
For example, instead of writing everything from scratch, you can install an existing package:
npm install express
npm downloads Express and makes it available to your project.
You can then use it in your application:
const express = require("express");

const app = express();

app.listen(3000);
npm is therefore an important part of the Node.js ecosystem.
What is a Package?
Before understanding npm, it is useful to understand what a package is.
A package is a collection of code that can be reused in an application.
For example, instead of implementing an entire web framework yourself, you can install Express:
npm install express
There are packages available for many different tasks, including:
- Web servers
- Database connections
- Authentication
- Validation
- File processing
- Logging
- Testing
- Date and time handling
- API development
The npm ecosystem contains a very large collection of reusable packages.
Checking the npm Version
When you install Node.js, npm is normally installed along with it.
You can check the installed npm version using:
npm -v
You can also check your Node.js version:
node -v
For example:
v22.x.x
and:
10.x.x
The exact version will depend on the Node.js installation on your computer.
Creating a Node.js Project
Let’s create a simple Node.js project.
First, create a directory:
mkdir my-node-app
Move into the directory:
cd my-node-app
Now initialize the project:
npm init
npm will ask you several questions, such as:
package name:
version:
description:
entry point:
test command:
git repository:
keywords:
author:
license:
After answering the questions, npm creates a file called:
package.json
Using npm init -y
If you don’t want to answer each question, you can use:
npm init -y
The -y option accepts the default values automatically.
This is commonly used when creating a basic project quickly.
After running:
npm init -y
you may get a package.json similar to:
{
  "name": "my-node-app",
  "version": "1.0.0",
  "description": "",
  "main": "index.js",
  "scripts": {
    "test": "echo \"Error: no test specified\" && exit 1"
  },
  "keywords": [],
  "author": "",
  "license": "ISC"
}
What is package.json?
The package.json file contains important information about your Node.js project.
It can contain:
- Project name
- Project version
- Description
- Entry point
- Scripts
- Dependencies
- Development dependencies
- Author information
- License information
For example:
{
  "name": "my-node-app",
  "version": "1.0.0",
  "description": "My first Node.js application",
  "main": "app.js",
  "scripts": {
    "start": "node app.js"
  },
  "dependencies": {
    "express": "^5.1.0"
  }
}
Let’s understand some of these properties.
The name Property
The name property specifies the name of your project.
{
  "name": "my-node-app"
}
It is normally written in lowercase and can contain numbers, hyphens, and other valid package-name characters.
The version Property
The version property represents the current version of your project.
{
  "version": "1.0.0"
}
Node.js projects commonly follow Semantic Versioning (SemVer).
A version such as:
1.2.3
generally represents:
Major.Minor.Patch
For example:
1.0.0— Initial release1.1.0— New backward-compatible functionality1.1.1— Bug fix
The description Property
The description property provides a short description of your project.
{
  "description": "A beginner Node.js application"
}
This becomes especially useful when publishing packages.
The main Property
The main property specifies the primary entry point of a package.
For example:
{
  "main": "app.js"
}
This indicates that app.js is the main entry file.
For many modern Node.js applications, the exact application startup command is instead explicitly defined in the scripts section.
The scripts Property
The scripts property allows you to define commands that can be executed using npm.
For example:
{
  "scripts": {
    "start": "node app.js"
  }
}
You can then run:
npm start
npm executes:
node app.js
You can create multiple scripts.
For example:
{
  "scripts": {
    "start": "node app.js",
    "dev": "node --watch app.js",
    "test": "node --test"
  }
}
You can run them using:
npm start
npm run dev
and:
npm test
The start and test scripts have special npm command behavior, while custom scripts are normally executed with npm run <script-name>.
Installing a Package
One of the most common npm commands is:
npm install
To install a specific package:
npm install express
After installation, npm updates your package.json.
For example:
{
  "dependencies": {
    "express": "^5.1.0"
  }
}
npm also creates a directory called:
node_modules
The installed package and its required dependencies are stored there.
What is node_modules?
The node_modules directory contains packages installed for your project.
After running:
npm install express
your project might look like:
my-node-app/
│
├── node_modules/
├── package-lock.json
├── package.json
└── app.js
You generally should not manually modify files inside node_modules.
You also normally do not commit node_modules to Git.
Instead, the project’s dependency information is stored in package.json and package-lock.json.
What is package-lock.json?
When you install packages, npm creates a file called:
package-lock.json
This file records the exact dependency versions resolved for your project, along with dependency information.
For example, your package.json might specify:
{
  "dependencies": {
    "express": "^5.1.0"
  }
}
The package-lock.json file records the specific versions that were resolved during installation.
This helps keep installations more consistent across different environments.
package.json vs package-lock.json
The two files have different purposes.
| package.json | package-lock.json |
|---|---|
| Describes the project | Records the resolved dependency tree |
| Lists dependencies | Records exact installed dependency versions |
| Contains project scripts | Helps reproduce dependency installations |
| Usually edited by developers | Normally managed automatically by npm |
Both files are important for most Node.js projects.
Dependencies
A dependency is a package that your application needs to run.
For example:
npm install express
This adds Express to the dependencies section:
{
  "dependencies": {
    "express": "^5.1.0"
  }
}
Your application can then use the package:
const express = require("express");
Other examples of runtime dependencies might include database drivers, authentication libraries, or API frameworks.
Development Dependencies
Some packages are needed only while developing or testing your application.
These are called development dependencies.
You can install a package as a development dependency using:
npm install --save-dev nodemon
It will appear under:
{
  "devDependencies": {
    "nodemon": "^..."
  }
}
For example, a testing framework or development utility may be a development dependency.
The distinction is essentially:
dependencies → needed by the application at runtime
devDependencies → needed primarily for development, testing, or build workflows
Installing a Specific Package Version
You can install a particular version of a package.
For example:
npm install express@5.1.0
This installs the specified Express version.
You can also install an older version if your project requires it:
npm install express@4
Updating Packages
To check which packages are outdated, you can use:
npm outdated
npm will show information about packages that have newer versions available.
You can update packages using:
npm update
For major-version upgrades, you should review compatibility changes rather than blindly updating everything.
Uninstalling a Package
If you no longer need a package, you can remove it with:
npm uninstall express
npm removes the package and updates the project’s dependency information.
Installing All Project Dependencies
Imagine you download a Node.js project from GitHub.
The project may contain:
package.json
package-lock.json
app.js
but it does not contain the node_modules directory.
You can install all required dependencies by running:
npm install
npm reads the dependency information and installs the required packages.
This is why you generally don’t need to share or commit the node_modules directory with your project.
Why Should You Not Commit node_modules?
The node_modules directory can become very large because packages can have their own dependencies.
Instead of committing it to Git, developers normally add:
node_modules/
to the project’s .gitignore file.
For example:
node_modules/
.env
When another developer downloads the project, they can simply run:
npm install
to install the required packages.
npm install vs npm ci
You may come across both:
npm install
and:
npm ci
npm install
Commonly used during development.
It installs dependencies and can update the lock file when needed.
npm ci
npm ci is designed for clean, reproducible installations, especially in automated environments such as CI/CD pipelines.
It relies on the lock file and installs the dependencies according to the locked dependency tree.
For example:
npm ci
This is commonly used in deployment and continuous integration workflows.
Local Packages vs Global Packages
npm packages can be installed locally or globally.
Local Installation
When you run:
npm install express
the package is installed in the current project.
It is recorded in the project’s dependency information.
This is the preferred approach for most application dependencies.
Global Installation
You can install a package globally using:
npm install -g <package-name>
Global installation makes a command-line tool available system-wide.
Global installation is more appropriate for certain CLI tools than for libraries that your application imports.
Using npm Packages in Your Application
After installing a package, you can use it in your Node.js application.
For example:
npm install express
Then:
const express = require("express");

const app = express();

app.get("/", (req, res) => {
    res.send("Hello Node.js!");
});

app.listen(3000, () => {
    console.log("Server running on port 3000");
});
The express package installed by npm is now being used by the application.
A Simple Node.js Project Example
Let’s create a small project from scratch.
Step 1: Create the directory
mkdir my-app
cd my-app
Step 2: Initialize npm
npm init -y
Step 3: Install Express
npm install express
Step 4: Create app.js
const express = require("express");

const app = express();

app.get("/", (req, res) => {
    res.send("Welcome to My Node.js App");
});

app.listen(3000, () => {
    console.log("Server running at http://localhost:3000");
});
Step 5: Start the application
node app.js
Or add a start script to package.json:
{
  "scripts": {
    "start": "node app.js"
  }
}
Then run:
npm start
Useful npm Commands for Beginners
Here are some npm commands you will frequently use:
| Command | Purpose |
|---|---|
npm -v |
Check npm version |
npm init |
Create a package.json interactively |
npm init -y |
Create package.json with defaults |
npm install |
Install project dependencies |
npm install <package> |
Install a package |
npm install --save-dev <package> |
Install a development dependency |
npm uninstall <package> |
Remove a package |
npm update |
Update packages |
npm outdated |
Check outdated packages |
npm run <script> |
Run a custom npm script |
npm start |
Run the start script |
npm test |
Run the test script |
npm ci |
Perform a clean lock-file-based install |
Common Beginner Mistakes
When learning npm, beginners often make a few common mistakes.
1. Manually Editing node_modules
Avoid manually changing files inside node_modules.
If a package needs to be changed or updated, use npm commands.
2. Committing node_modules
Do not normally commit the entire node_modules directory to Git.
Use .gitignore instead.
3. Installing Everything Globally
Installing application libraries globally can cause version and dependency problems.
Install project dependencies locally unless there is a specific reason to install a command-line tool globally.
4. Ignoring package-lock.json
For applications, package-lock.json is normally useful because it records the resolved dependency tree and helps maintain reproducible installations.
5. Installing Packages Without Checking Them
Before adding a third-party package to your application, check its documentation, maintenance status, compatibility, and whether it is actually necessary.
npm and package.json: How They Work Together
The relationship between npm and package.json can be summarized like this:
          Node.js Project
                |
                ↓
           package.json
                |
                ↓
        npm install command
                |
                ↓
          node_modules
                |
                ↓
       Packages available
        to your application
For example:
npm install express
causes npm to install Express and record it as a project dependency.
Later, another developer can clone your project and run:
npm install
to install the project’s dependencies.
Conclusion
npm and package.json are fundamental parts of Node.js development.
npm is the package manager that helps you install and manage reusable packages, while package.json stores important information about your project, including its dependencies and scripts.
The most important commands to remember as a beginner are:
npm init -y
npm install <package>
npm install --save-dev <package>
npm uninstall <package>
npm update
npm outdated
npm install
npm ci
You should also become familiar with these three files/directories:
package.json
package-lock.json
node_modules/
Once you understand npm and package.json, you will be able to create Node.js projects, install third-party packages, manage dependencies, and work with existing Node.js applications much more confidently.
In the next step of your Node.js learning journey, a good topic to learn is Node.js Modules: require, exports, and module.exports, because modules are essential for organizing larger Node.js applications.


